Posted on

How to build dip bars or parallel bars

Parallel bars or dip bars are a pretty simple to install as the posts are much easier to handle. See pull up bar installation document for positioning and leveling pull up bar posts as the same principles apply…

1) Use a stringline to determine the position of your dip bars in what is essentially a rectangle.

2) Put your first dip bar post in at 700mm deep with 1200mm out of the ground.

3) Line up your second dip bar post 405mm apart and at the same height.

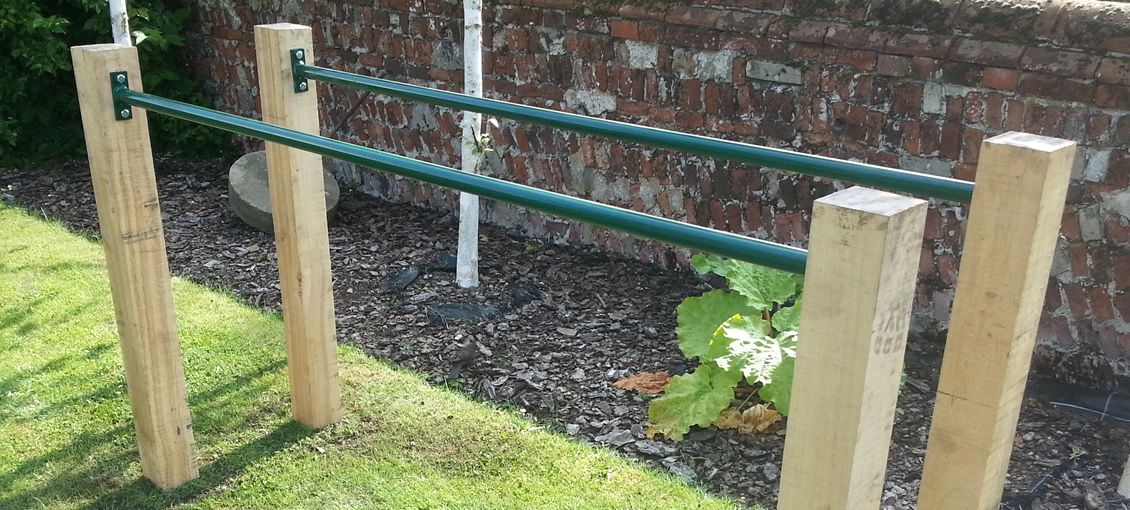
4) Now put the two remaining dip bar posts in at the other end at whatever distance your dip bars are.

5) It is easier to use a clamp to put the dip bar in position.  Mark the holes. Use approx a 4mm drill bit and MK10 Screws.

Take your time.

Below is a timelapse video which you can pause to see how we install these parallel bars / dip bars.

Have fun!

The Xorbars Team

Posted on

Parallet Bars for Big Shoulders

parallet bars for big shoulders

So you want bigger shoulders!?  Adding parallet bars to your calisthenics workout is one sure fire way to increase your shoulder size and strength.

By positioning the parallets under a mid height pull up bar you can use the bar to support your legs which can also assist you in performing the shoulder handstand press.

Standard parallet exercises such as L-sits added to your ab program will strength your core in static positions.

Our Xorbar Parallet package can be bought as an add on to our other pull up bar packages or as an individual calisthenics exercise station in your garden.

Once you can do hand stand presses on these parallet bars…well then we would love to see your photos.

The Xorbars Team


Posted on

Diy pull up bar installed in Coventry

We enjoyed installing this awesome diy pull up bar package in Coventry over the weekend.

  1. High pull up bar.
  2. Lower pull up bar.
  3. Back row or dip bar.

Plus the added swing made a nice touch for all the family to enjoy.

The installation of this diy pull up bar package took us around 6 hours to complete. That’s two of us working on it.  A video link of the diy pull up bar installation is shown below. Video: Xorbars time lapse pull up bar installation

If you have moderate DIY skills and a bit of patience then the only hard bit really is digging the holes.  You just have to keep slogging away until you are 3ft /900mm down.

But once you have done that then the rest is pretty straight forward and you will have a great outdoor pull up bar or outdoor multi gym all ready to go.

If you need any advice please contact us.
Thanks

The Xorbars Team

Posted on

Outdoor Pull Up Bars Installed in Southwold

We love this Outdoor Pull Up Bar Set Up

This bespoke outdoor pull up bar configuration was installed at a customers home in Southwold.

The addition of the mini pull up bars for incline press ups and vertical shoulder press makes it one of our favorite pull up bar set ups to date.

This outdoor pull up bar configuration consists of the following:

  • 2 x pull up bars at different heights
  • 1 x parallel bars
  • 2 x mini bars for incline press ups and vertical shoulder press

The installation of these outdoor pull up bars took approximately 7 hours to complete.

You can purchase this complete configuration online as a package or by purchasing the outdoor pull up bars separately and sourcing the posts and poscrete yourself.

We would like to thank our customer for coming up with the idea for the mini bars.