Posted on

Inverted Rows using Xorbars

back rows

This blog post will teach you why Inverted Rows (a.k.a. Body Rows, Australian Rows or Incline Rows) are great for your upper back and arms, how to get started, and how to progress the exercise from relatively easy, to brutal!

Why you should do Inverted Rows

One of the problems of exercising in the gym, particularly for a relative beginner, is you’re just not lifting heavy enough.  Consequently, pull-ups may seem way out of reach. So you just grind out a few reps with dumbbell or cable rows, and the lat pulldown machine, with what you think is a moderately heavy weight.

It’s only when you start doing Inverted Rows, that you realise you were taking it way too easy on yourself. Inverted Rows are suitable for all strength levels, as you can progress the exercise from super-easy, to so difficult that you can’t even perform 1 repetition!

If you suffer from lower back pain, then Inverted Rows are a much better alternative to dumbbell or barbell rows, as this exercise puts a lot less strain on your lower back.

It also works in the opposing direction to the Bench Press or Push Up, so can help to correct that hunched-forward “ape” look, if you’ve been over-doing it on the horizontal pressing.

Muscles worked by Inverted Rows

This is a great overall exercise for the upper-back and arms. It helps to create that V-shape by working the Lats (that muscle under your arm-pit), Rhomboids and Trapezius (middle back), rear Deltoid (shoulders), and Biceps.

Once you get started on the rows, you’ll soon discover that the exercise also works your core, as it’s like a moving plank.

Equipment Required

You can do this exercise with a static bar. But if the bar is completely fixed, then it’s difficult to progress. If you’re in a gym, then the Smith Machine is perfect for this exercise, as you can adjust the height of the bar to increase the difficulty level.

My preference for this exercise is suspension equipment, such as gymnastics rings, or TRX, as you can put them up anywhere and they are easily adjusted.  They also make the exercise more difficult than performing on a bar, due to the stability issue.

Warm Up

Always begin exercise with a dynamic stretching warm up [Click Here].

If you’re going to try low reps with maximum resistance, then additionally do 1-2 warm-up sets of easier Inverted Rows beforehand.

Safety

Safety first—check your equipment is definitely fixed and can take your weight before you start leaning back.

I always jump up onto my gymnastics rings in a dip position, or just hang underneath with tucked legs, before I start my first set.  Things can move, so I always perform this double-check.

If cables are sliding, then you haven’t fixed them correctly.

Inverted Rows—Technique

I’ll refer to the anchor point during the technique—assume this is where the rings or TRX are hung, and there’s an imaginary vertical line from there straight down to the floor.  If you’re using a fixed bar, then it’s that.

For your first time, set the level of the rings or bar just under chest height, then adjust afterwards, depending on your strength levels.

Getting in Position-Inverted Rows—Why And How You Should Do Them - VISIT BusyParentFitness.com #followme #instalike #fitnessblogger #fitspo #traininsaneoremainthesame #beastmode #mblogger #dblogger #pblogger #FitnessFriday #fitfam #exercise #workout #fitness #outdoorfitness #gainz #CrossFit #Bodyweight #fitdad #FitdadsofIg #fitdaddy #thefitandactiveparents #muscle #lats
I exercise on a customised Xorbars Multi-Gym in my garden xorbars.co.uk

Starting position:

  • Stand facing the anchor point and grip the:
  • Rings / TRX in a neutral “hammer” grip position.
  • bar with an over-hand grip (palms facing away from you), shoulder-width apart.
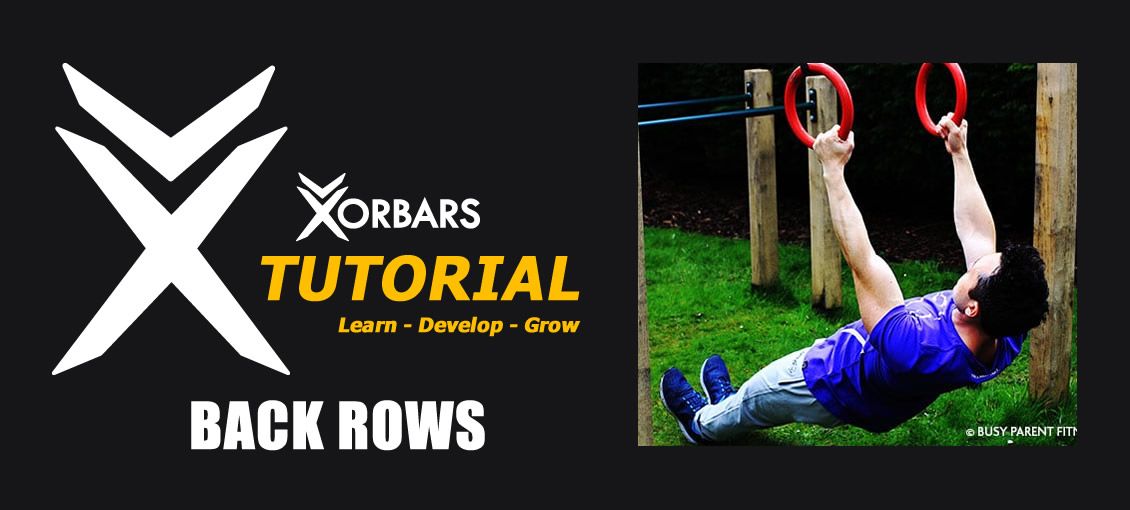
  • Walk forward slightly, to ideally create a 45 degree angle with your body (the further your feet go past the anchor point, the harder this exercise becomes).
  • Before you stretch your arms to lower your body, brace your core and bend one leg at the knee, to support yourself as you lower.
  • Then put both legs together.
  • When your feet get further and further away from the anchor point, I find it more comfortable to do the exercise on my heels, rather than a flat foot.

Inverted Rows-Start—Why And How You Should Do Them - VISIT BusyParentFitness.com #followme #instalike #fitnessblogger #fitspo #traininsaneoremainthesame #beastmode #mblogger #dblogger #pblogger #FitnessFriday #fitfam #exercise #workout #fitness #outdoorfitness #gainz #CrossFit #Bodyweight #fitdad #FitdadsofIg #fitdaddy #thefitandactiveparents #muscle #lats

Begin:

  • Keeping your entire body in a straight line (and remembering to contract your abs), pull your body towards the rings / bar.
  • Keep your elbows in, and “graze” the inside of your arms against your ribs, until your hands reach your chest.
  • Try to keep your chest puffed out, so that you get a good squeeze of the shoulder blades at the top. I like to hold it for 1 second.
  • If there’s slack in the cable, or you are standing completely upright with no effort, then position your legs further forward, to increase the difficulty.
  • After the squeeze, lower your body by extending your arms back to the starting position.
  • Remember to keep your body tight and in a straight line throughout the exercise (not bowed like a banana).
  • Repeat—pulling yourself back up again.

Inverted Rows-Finish—Why And How You Should Do Them - VISIT BusyParentFitness.com #followme #instalike #fitnessblogger #fitspo #traininsaneoremainthesame #beastmode #mblogger #dblogger #pblogger #FitnessFriday #fitfam #exercise #workout #fitness #outdoorfitness #gainz #CrossFit #Bodyweight #fitdad #FitdadsofIg #fitdaddy #thefitandactiveparents #muscle #lats

Finishing the exercise:

Bend one leg at the knee to help support your body, then stand up.

How to make Inverted Rows more difficult

Go horizontal

Keep walking your feet forward until your arms are hanging directly below the anchor point. Adjust the hight of the rings / bar so that your body hangs only a few inches from the floor.

Feet elevated Inverted Rows

Elevated Inverted Rows-Start—Why And How You Should Do Them - VISIT BusyParentFitness.com #followme #instalike #fitnessblogger #fitspo #traininsaneoremainthesame #beastmode #mblogger #dblogger #pblogger #FitnessFriday #fitfam #exercise #workout #fitness #outdoorfitness #gainz #CrossFit #Bodyweight #fitdad #FitdadsofIg #fitdaddy #thefitandactiveparents #muscle #lats

Elevated Inverted Rows-Finish—Why And How You Should Do Them - VISIT BusyParentFitness.com #followme #instalike #fitnessblogger #fitspo #traininsaneoremainthesame #beastmode #mblogger #dblogger #pblogger #FitnessFriday #fitfam #exercise #workout #fitness #outdoorfitness #gainz #CrossFit #Bodyweight #fitdad #FitdadsofIg #fitdaddy #thefitandactiveparents #muscle #latsHanging directly below the anchor point, put your feet on a bench and then row.

Front Lever rows

Tucked Front Lever Inverted Rows-Start—Why And How You Should Do Them - VISIT BusyParentFitness.com #followme #instalike #fitnessblogger #fitspo #traininsaneoremainthesame #beastmode #mblogger #dblogger #pblogger #FitnessFriday #fitfam #exercise #workout #fitness #outdoorfitness #gainz #CrossFit #Bodyweight #fitdad #FitdadsofIg #fitdaddy #thefitandactiveparents #muscle #lats

Tucked Front Lever Inverted Rows-Finish—Why And How You Should Do Them - VISIT BusyParentFitness.com #followme #instalike #fitnessblogger #fitspo #traininsaneoremainthesame #beastmode #mblogger #dblogger #pblogger #FitnessFriday #fitfam #exercise #workout #fitness #outdoorfitness #gainz #CrossFit #Bodyweight #fitdad #FitdadsofIg #fitdaddy #thefitandactiveparents #muscle #lats

This is a tremendous increase in resistance. Front Lever’s are a foundation exercise in Calisthenics and Gymnastics. Just holding the position is one thing…trying to row at the same time, is a whole new “ball game!” Most people will not be strong enough to do this exercise:

  • hang under the anchor point
  • tuck your knees to your chest, and lift your body up so that your back is reasonably horizontal. You’ll be facing the ceiling
  • pull your body to the handles / bar
  • hold the top position for 1 second if you can
  • lower under control, and keep your body horizontal throughout the entire exercise
  • as you become stronger, you can extend your legs, and push yourself further away from the anchor point, so that you look like your doing an upside-down push up—that’s the full Front Lever

George Choy (Certified Calisthenics Instructor)

For more information on George Choy or to visit his excellent website for more workouts and healthy eating tips and recipes, please visit www.busyparentfitness.com

Posted on

Skin the Cat with Xorbars

skin the cat with xorbars

How to do the Skin the Cat exercise, muscles worked, and a video tutorial.

Muscles Worked

This is a great exercise that I always do at the end of my workout, to increase shoulder mobility, and feel a great stretch. I like to hang for 15 seconds or more.

Skin the Cat works most of your body—you’ll need strong Lats and Abs just to get into the starting position of an Inverted Hang. Your Posterior Deltoids (Shoulders), Upper Back and Lats will get quite a workout.

If you want to safely progress to learning the Back Lever exercise, then you need to master Skin the Cat first.

Prerequisites for Skin the Cat Exercise

  • 6 Pull-ups or Chin-ups
  • Hold an Inverted Hang for at least 10 seconds continuously

Equipment Required

You can do this exercise on Gymnastics Rings, a Pull-up bar, or a sturdy bar in a playground. It’s safer to start with a low-level bar (like railings) when you’re first learning the exercise, so you don’t have far to fall.

Skin the Cat Exercise Technique

Always begin exercise with a dynamic stretching warm up [Click Here].

Starting with a low-level bar:

  • Hold the bar with an over-hand grip, shoulder-width apart
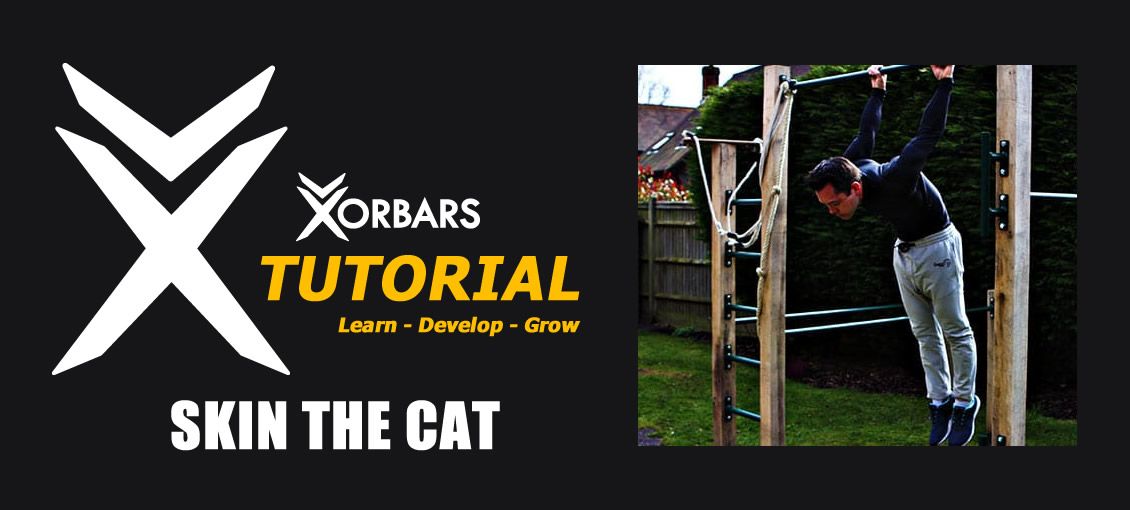
  • Bring your knees to your chest and lean your body backwards, until you’re hanging inverted and your feet have cleared the bar
  • Keeping your knees tight to your chest, lower and stretch as far as you find comfortable—this must be a controlled decent
  • Use your feet to stop your decent, then let go of the bar and repeat

CAUTION

  • This exercise could have a high risk of injury, so take your time to slowly increase the stretch, so you don’t rip your shoulders off ? …or fall on your head!
  • Some people feel a prickling sensation in their upper back the first few times they try this exercise, so work the area slowly, going back and forth whenever you feel the prickles. Eventually you’ll stop feeling this, but it may take a couple of workouts.
  • Take your time to progress from one stage to the next, in order to avoid injury.

Progression 1: Extended legs with support

  • Ideally use a medium height bar that allows you to extend your legs further than a tuck, and be able to comfortably touch the ground, to support some of the weight.
  • Once you’re comfortable with a deep stretch, you can carefully lift your feet, and take the full weight on your shoulders.

Progression 2: Extended legs with no support

  • Move to a high bar that will not allow your feet to touch the ground
  • Once your feet have passed the bar, you can bring your knees over your head in a pike position (straight legs, bent at the hips)
  • Stretch all the way down
  • Let go when you’re finished

Progression 3: Roll back up

  • Rather than letting go of the bar at the end, you can roll back up to the inverted position
  • Start with tucked knees to begin with, and gradually work up to the pike version.

Watch the video tutorial

George Choy (Certified Calisthenics Instructor)

For more information on George Choy or to visit his excellent website for more workouts and healthy eating tips and recipes, please visit www.busyparentfitness.com
Posted on

The Best Chest & Tricep Workout Using Xorbars

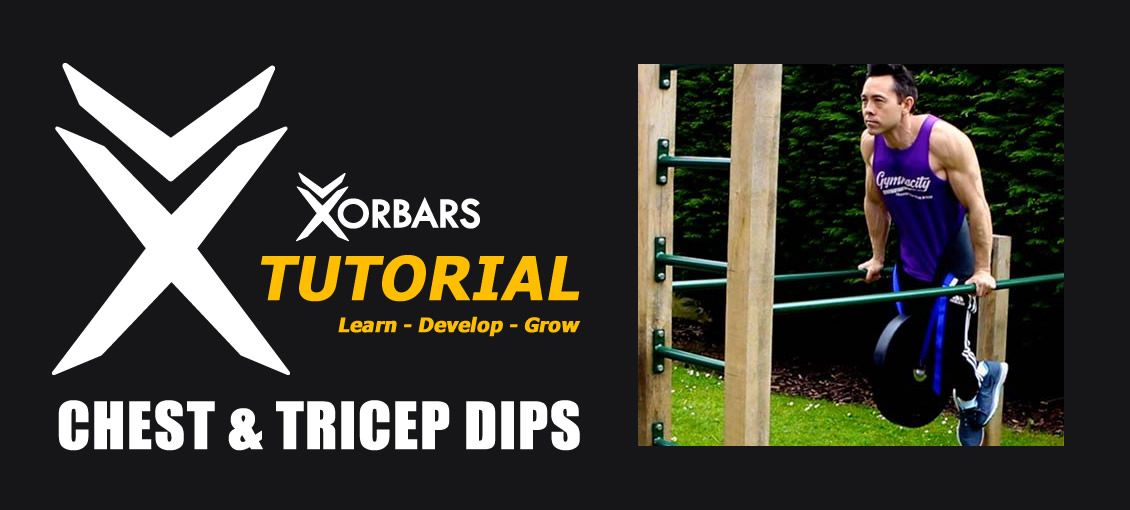
Chest & Tricep Dips on Parallel Bars

What Is The Best Chest And Tricep Workout

A chest and tricep workout from beginner to advanced level. Dips are great for men to pack on some muscle mass, or for women to provide more support to the breast area.

Which exercise for the Chest and Triceps?

Whilst the bench press and push-up are usually the go-to exercise for working the chest, they can tend to overwork the front deltoids (shoulders) and under-work the pectorals (chest).  One of THE best Chest and Tricep workouts you will experience is with progressive versions of Dips. 

Some people give dips a bad rap for shoulder problems, but a lot of people end up with shoulder problems with benching.  The key to safer dips, is to ensure you lean forward. 

Dips are like an upper body squat — they’re a lot harder than they look!  I’ve had some training clients that can easily bang out 20 push-ups, but find that they can’t do even 1 dip.  However, with the assistance of some bands, even a complete beginner can do a dip workout.

I have some progressions below that will be astonishly challenging for those who find weighted versions easy, and will make your arms quiver like there’s no tomorrow

Rep Range

  • Aim for 6-12 reps for 3-4 sets.
  • Lower reps using heavier resistance can sometimes aggravate the shoulders, so be cautious with heavy weights.

Dipping Technique

  • Lean forward with your torso — 45 degrees is ideal. This puts more emphasis on your chest, and less strain on your shoulders than an upright position.
  • Hinge at the hips to put your feet inline with your head (or further in front), to balance your body, and contract your abs.  If the ground is too low, then it’s ok to bend your legs, but still hinge at your hips.
  • Keep your feet together.
  • Bend your arms behind your body (rather than out to the side), otherwise you can experience shoulder pain.

Chest and Tricep Workout Progressions

  • Please read through the progressions below, and then watch the video at the bottom to see a couple of them demonstrated.
  • Work your way through from levels 1 to 8. You can skip level 3 weighted dips, if you don’t have the equipment.

1. Band Assisted Dips (for Beginners)

Parallel Bar Dips - Beginner - Girls - Best Chest and Tricep Workout - Muscle - Tone - Breast - Perky

– Squeeze a resistance loop band between your hands, and rest your knees on the band.

– Lower by bending your arms 90 degrees — roughly where your shoulders are in line with your elbows.

2. Regular Dips on Parallel Bars

  • As above, but without the band.

3. Weighted Dips

Weighted Dips - Best Chest and Tricep Workout - Muscle - Mass - Pecs

– Wear a dipping belt and plates.

– A decent goal to aim for is 50% of your bodyweight in plates

4. L-Sit Dips on Parallel Bars

L-Sit rest between sets #Gymnastics #Calisthenics #fitnessblogger #fitnessbloggers #fitnessblog #fitspo #fitfam #exercise #workout #fitness #gainz #muscle

– If you don’t have a dipping belt to add weight, you can make this exercise substantially harder, by staying in an L-Sit position the whole time.

– Hold your legs straight out in front of your body, horizontal with the ground. Stay in that position and start dipping.

– A slight forward lean is ok and will reduce your chances of shoulder injury.

5. Single Bar Dips

Bar Dips - Best Chest and Tricep Workout - Muscle - Mass - Pecs - Muscle Up

– You’ll feel more unstable than the parallel bar version.

– Lean forward a lot more on the way down, aiming to get your lower-chest to the bar.

– This is a great exercise to start learning the Muscle-Up.

6. Ring Dips

– No matter how how much weight you can strap around your waist when doing parallel bar dips, the first time you try the rings will be a humbling experience!

– Your arms will shake like crazy, as you fight to keep them close to your body. … and that’s before bending your arms. No wonder gymnasts have incredible physiques!

– Lower and aim for the top of the rings to reach your armpits.

7. Ring Dips — Rings Turned Out (RTO) at the Top

Ring Dips - Rings Turned Out RTO - Best Chest and Tricep Workout - Muscle - Mass - Pecs

– If you thought transitioning from parallel bars to ring dips was challenging, then prepare to be humbled once again!

– This little twist not only works the chest and triceps, but puts tremendous strain on the biceps.  If you have any kind of biceps injury at the moment, don’t attempt this exercise.

– Start at the top of the movement, by turning your palms to the front (RTO). Hold for a second, then turn them back to neutral (palms facing your body) and dip down.  Get back into the RTO position again at the top.

8. Ring Dips, RTO the whole time

– When RTO at the top becomes too easy ? keep the RTO position the whole time.

– This is insanely difficult.


Try some of these exercises out on your next Chest and Tricep Workout.


George Choy (Certified Calisthenics Instructor)

For more information on George Choy or to visit his excellent website for more workouts and healthy eating tips and recipes, please visit www.busyparentfitness.com

Posted on

How to Do a Pistol Squat

How to do a pistol squat

Pistol Squats are a challenging single leg exercise — great if you can’t get to the gym,  or if you suffer from lower-back pain and can’t do weighted squats. They also look cool!

The Benefits of Pistol Squats

There are many advantages of including single leg squats in your workouts…

  • Build strong legs
  • No equipment or gym required
  • Improve strength imbalances — most people have a strong side and a weak side, or even one leg shorter than the other!
  • Increased balance and coordination
  • Better lower-body mobility

Before You Start Doing Pistol Squats

You should already be able to do full-depth bodyweight squats using both legs, without your heels lifting off the ground. I find that many training clients are initially unable to this, so don’t be disheartened if you’re one of them.

IMPORTANT — If you can’t do bodyweight squats with both legs, then you shouldn’t even attempt a pistol squat, otherwise you could damage yourself.

A useful mobility exercise is to squat to the floor, and whilst keeping both of your heels down (and holding onto something), rock forward and backward to loosen up the hips and ankles. Do this for a minute, and repeat daily.

Doing calf raises on a block, can also help to stretch the calves and provide more movement.

Don’t forget to warm up before starting any exercise routine. Click here for a dynamic warm up.

How To Do Pistol Squats

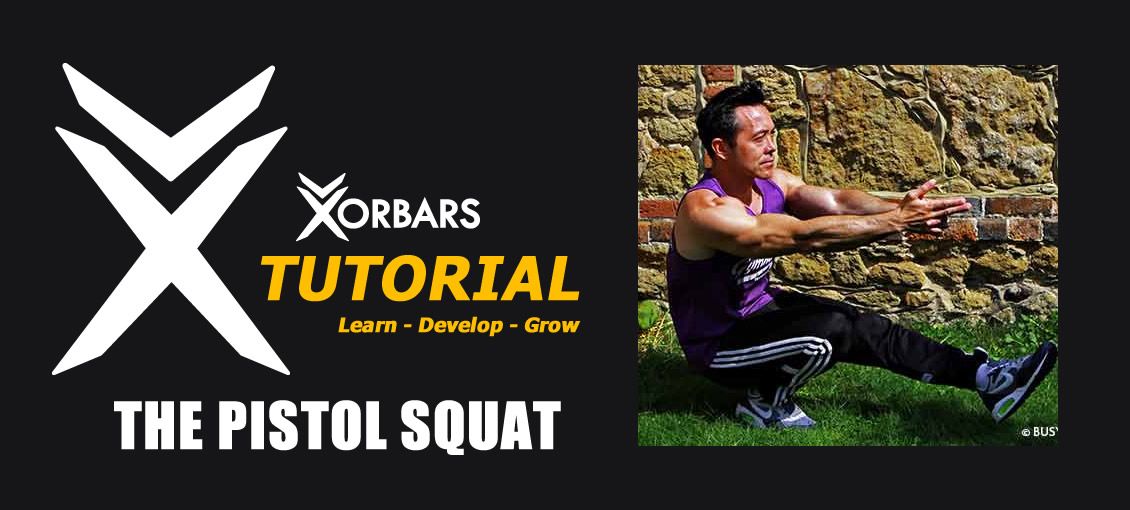
  • Stand up straight and stretch out both arms in front of you — you can clasp them together, but it is easier in the beginning to keep them apart and have something within reach that you can grasp if you lose balance.
  • Lift one leg, and extend it in front of you. Try to clamp your knees tight together — it helps with stability.
  • Descend with control until your glutes reach your calves, whilst further elevating the raised leg, so it doesn’t touch the floor.
  • You’ll find you’ll find you need to sit back and lean forward at the same time, to avoid falling backwards.
  • Stand up, without bouncing in the bottom position, or touching your raised leg on the floor.

Pistol Squats TechniqueAside from the balance issues, pistol squats feel a lot different to squatting with both legs. You’ll find that you need to make minute adjustments in your hips and ankles, to get into a position where you are sitting on your calf at the bottom of the movement, without falling over backwards.

If you have lack of hamstring flexibility or ab strength to keep your raised leg straight and high enough, you can sometimes get a few inches higher, if you point your toes on the elevated straight leg.

Pistol Squats for Beginners

Unless you can do about 40 bodyweight squats or weighted squats with at least half your bodyweight on the bar, at full-depth, then pistol squats will be extremely challenging for you at the beginning.

Aim to achieve 10-12 reps of 3-5 sets at each stage, before moving to the next level.

  1. Box Pistol: A good way to start is doing the pistol squat, is to squat down to a bench or chair. Although this is only a partial movement, you’ll start to get a feel for the balance required.
  2. Negative Pistol: If you can achieve 12 reps of the bench pistols, then you can try negatives. Find something to hold onto, like a vertical pole, or door-frame, and lower slowly on one leg for four seconds, then use both legs to stand back up. Be very careful not to increase the number of negative reps too quickly, otherwise you may become extremely sore or damage yourself, if you’re not strong enough. Most people can start with 4-6 reps.
  3. Assisted Pistol: Attempt to go both up and down on one leg, whilst holding onto a vertical bar or other object, and using it less and less to pull yourself up. Aiming eventually for just fingertip assistance for balance in the end. Holding onto gymnastic rings or a TRX can also be useful, but will be more challenging than a static support.
  4. Pistol with Counterweight: Now it’s time to let go of the support, and hold a small weight in your outstretched arms. It’s one of the rare exercises where adding a weight can make the exercise easier…it helps with balancing.

If you’re still struggling to keep your elevated leg from touching the floor, then in the beginning you can stand on a step, to give you some additional ground clearance.

Also remember to always work your weakest leg first, and perform the same number of reps on each leg.

Advanced Pistol Squats

Okay. So now you can do pistol squats. Congratulations!! How do you make them harder?

  1. Change your balance: Put your hands behind your back — you’ll fight the urge not to fall over.
  2. Jump Pistols: lower down to the bottom, then start raising up (and once you have tension) explode up. Land with a slightly bent knee and lower back to the floor with control. You can also jump onto elevated objects.
  3. Add weight: Hold a weight to your chest (not outstretched in front of you), hold dumbbells by your side, or wear a weighted vest. You can also do it with a barbell across the front of your shoulders, but I don’t find it very comfortable.

Take your time to learn the pistol squat, and keep challenging yourself to improve at each workout — eventually you’ll get there.


George Choy (Certified Calisthenics Instructor)

For more information on George Choy or to visit his excellent website for more workouts and healthy eating tips and recipes, please visit www.busyparentfitness.com


Posted on

Fat Burning Pull Up Bar Workout

pull up bar workout

One of the best ways to burn fat is to combine resistance training with heart rate elevation.  This workout is simple. All you need is a pull up bar and ideally parallel bars or dip bars…but you can do it with just a pull up bar.


The Exercises:

  • Pull Ups or Chin Ups – Pick which ever one you can do.
  • Toes 2 Bar or Knee Raises- Hang from the bar and either bring your knees to your chest or ideally your toes to the bar.
  • Parallel Bar Dip or Straight Bar Dips – Standard dips or chest to bar dips on a straight bar

Sets, Reps and Rest

Complete the following exercies in order for 30 mins EMOM “every minute on the minute”

  • 40 seconds x Pull Ups then 20 seconds rest
  • 40 seconds x Toes2Bar then 20 seconds rest
  • 40 seconds x Dips then 20 seconds rest

Note: Set a specific number you want to achieve in the 40 seconds.  Don’t go too high.  Try and hit the same number for every set.  Then when you do the routine again, increase your target.

Extra Rest: If you are just starting out then you can complete all three exercises and then add in 40 seconds of air squats. This will give your muscles a little longer to recover before going again but still keeping your heart rate elevated.


Frequency

Perform this routine up to 3 x per week for 4 weeks.


Muscle Used

The above exercises will work your back, biceps, chest, triceps and abdominals.


Why use EMOM

EMOM means “every minute on the minute” and has been popularised in crossfit.

This system seeks to avoid muscular failure and better manage fatigue. This in turn allows you to do more total quality reps each workout.


Progression

EMOM’s are a great tool for measuring progressions from week to week. You can increase the reps in the same time period or progress to 50 seconds – 10 seconds rest etc.


And Finally…

This simple tool can be used with any number of exercises.  If you have your own favourite then why not drop us a line and we will publish on here.

Unleash your pulling power!…

The Xorbars Team